[polldaddy poll=9764234]
Ở bài 61 và bài 62 các bạn đã biết cách chuyển định dạng JSon qua Java class, trong bài này Tui sẽ hướng dẫn các bạn cách chuyển đổi phức tạp nhất và cũng là cuối cùng.
Tui sẽ viết phần mềm truy tìm thông tin trên Internet thông qua Google Search API (kết quả trả về của API này là một định dạng JSon phức tạp: Đối tượng chứa đối tượng, đối tượng chứa tập các đối tượng). Sau đó các bạn dựa vào project này để tiếp tục phát triển nó lên để sử dụng trong thực tế luôn.
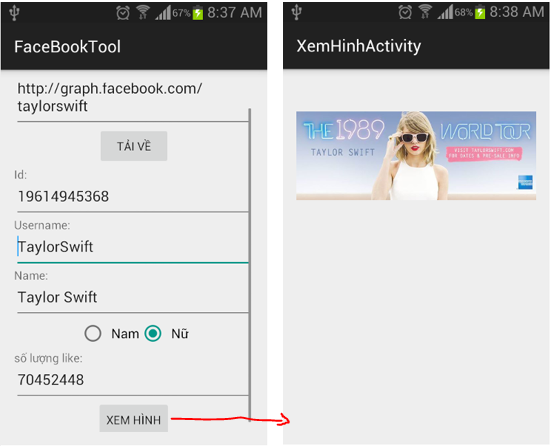
Tui Demo giao diện sử dụng như sau:
 – Hình bên trái dùng để hiển thị kết quả của Google Search API gửi về (gửi về thông qua JSON)
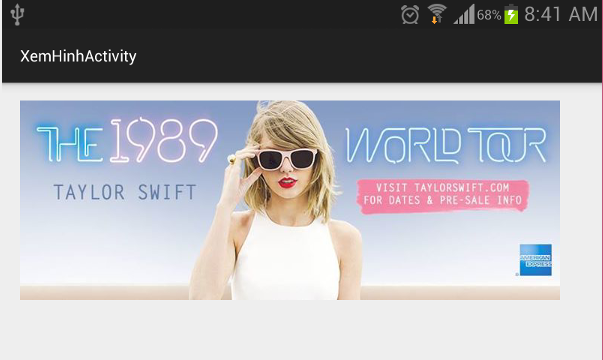
– Hình bên phải là lúc người sử dụng chọn bất kỳ kết quả nào thì nó mở website đó lên để đọc thông tin chi tiết.
Trước tiên bạn cần hiểu cách sử dụng công cụ Google Search API (Được xử lý bằng Ajax và trả về JSON):
————————————————————————-
Cú pháp:
http://ajax.googleapis.com/ajax/services/search/web?v=1.0 &q={thông tin cần tìm}&start={vị trí bắt đầu lọc}&rsz={block lọc}
————————————————————————-
q: là thông tin bạn cần tìm kiếm trên mạng
start: là vị trí bắt đầu lọc
rsz: là block lọc (bạn chỉ chọn 2 loại block là 4 hoặc 8; tức là mỗi lần lấy về 4 hoặc 8 kết quả),
Như vậy nếu bạn muốn truy vấn thật nhiều thông tin thì bạn nên chọn Bội số của rsz rồi cho vòng lặp chạy theo bước start=start+rsz
Bạn thử đưa ra công thức vòng lặp với yêu cầu của Tui: Hãy trả về 24 dòng kết quả tìm kiếm thông tin “Hang Sơn Đoòng“? Vậy bạn phải viết vòng lặp như thế nào?
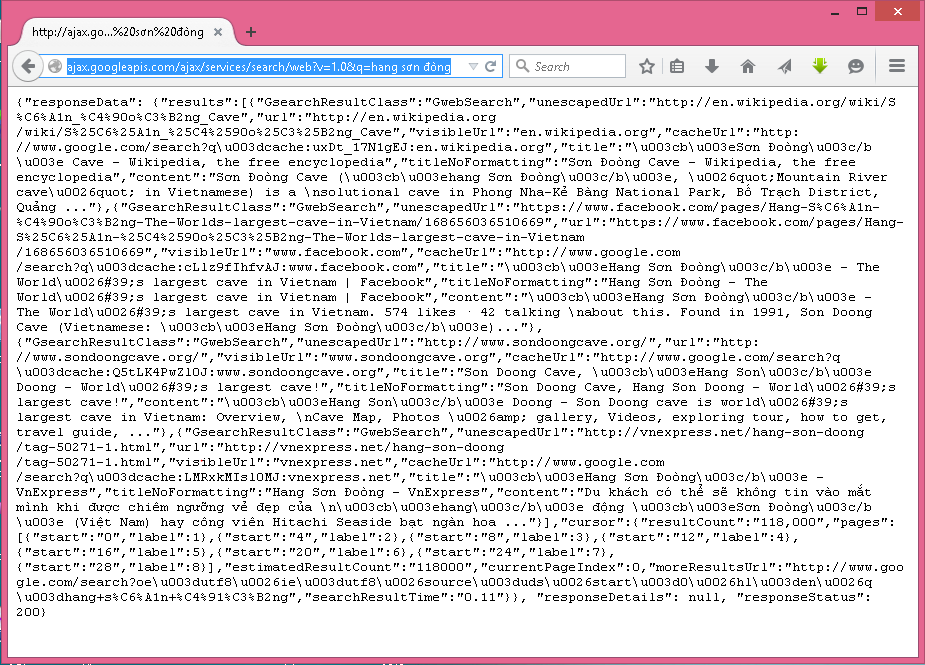
Sau đây ta xem ví dụ thứ 1:
http://ajax.googleapis.com/ajax/services/search/web?v=1.0&q=hang sơn đoòng:
Nếu chỉ có q bên trên thì kết quả mặc định là block 4 như kết quả dưới đây:
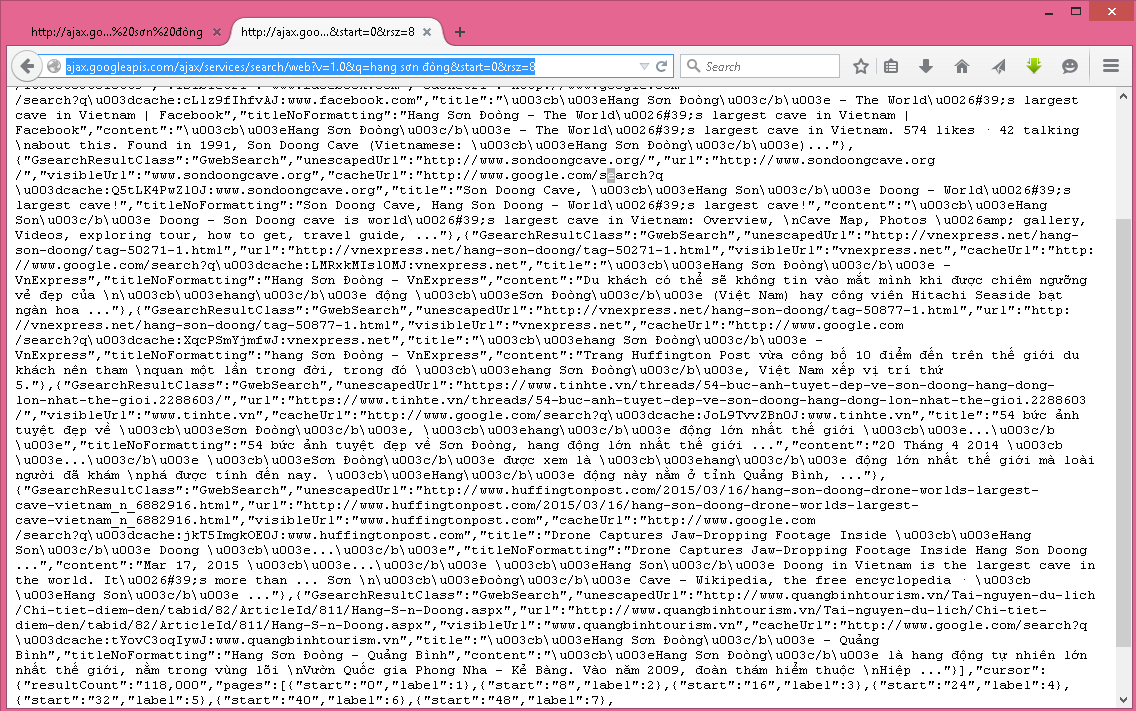
 Sau đây ta xem ví dụ thứ 2:
http://ajax.googleapis.com/ajax/services/search/web?v=1.0&q=hang sơn đoòng&start=0&rsz=8
Nếu đủ 3 thông số q,start,rsz bên trên thì kết quả mặc định là rsz như kết quả dưới đây (tức là 8 dòng):
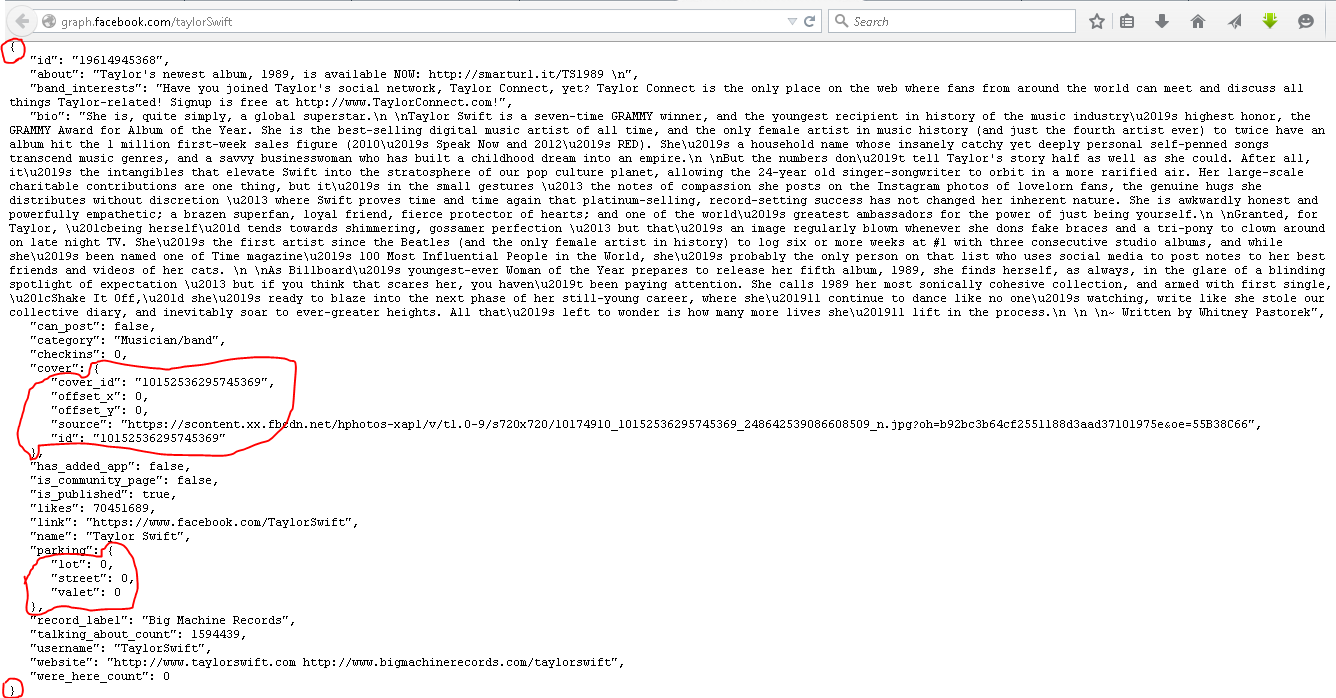
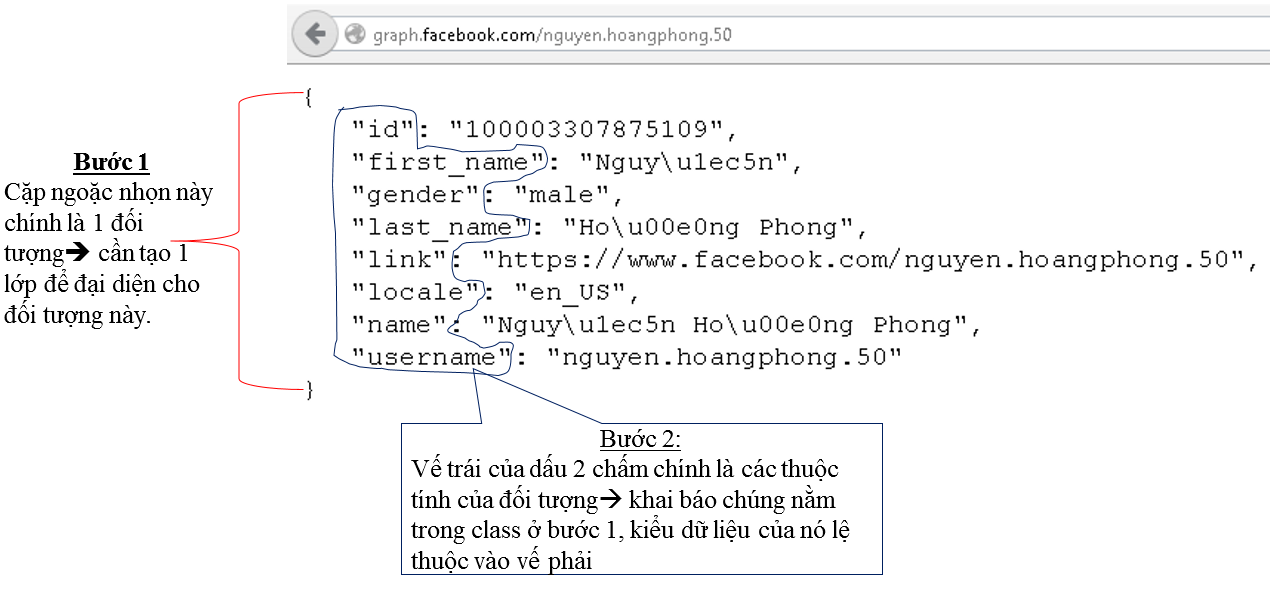
 – Bạn thấy đấy, đây là một kết quả JSON khá phức tạp, nếu không nói là nhìn thấy bỏ của chạy lấy người luôn.
– Bây giờ Ta tiến hành phân tích một số thông tin quan trong trong cấu trúc JSON này nhé: 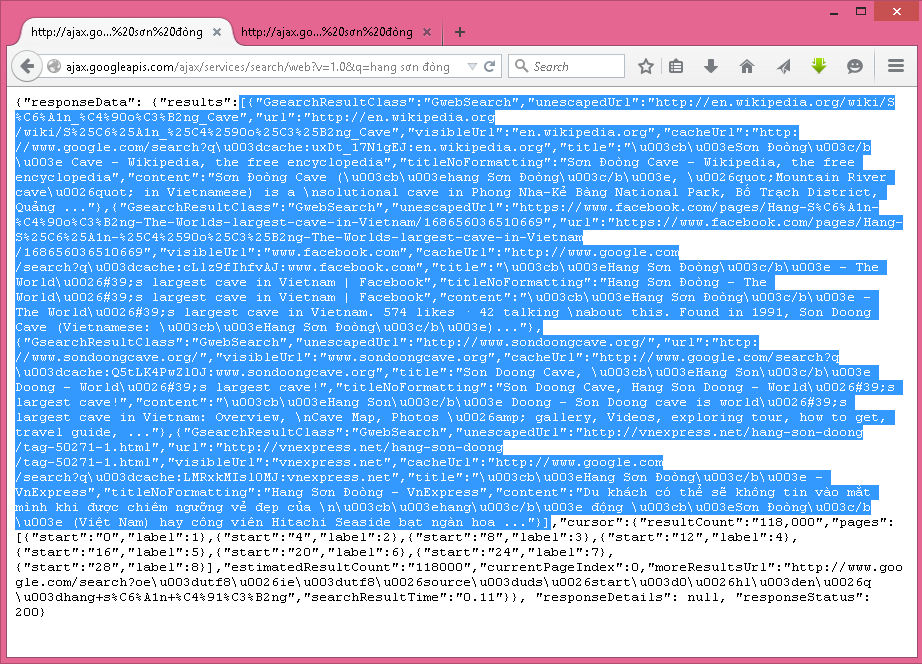 – Bạn thấy Tui tô đen dữ liệu có nằm trong ngoặc vuông [], định dạng nằm trong [] chính là mảng hay danh sách.
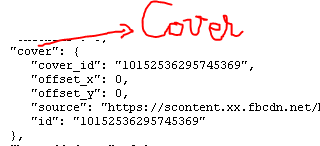
– Tiếp theo Tui chọn 1 đối tượng (tức là được nằm trong cặp ngoặc nhọn thuộc [] này:
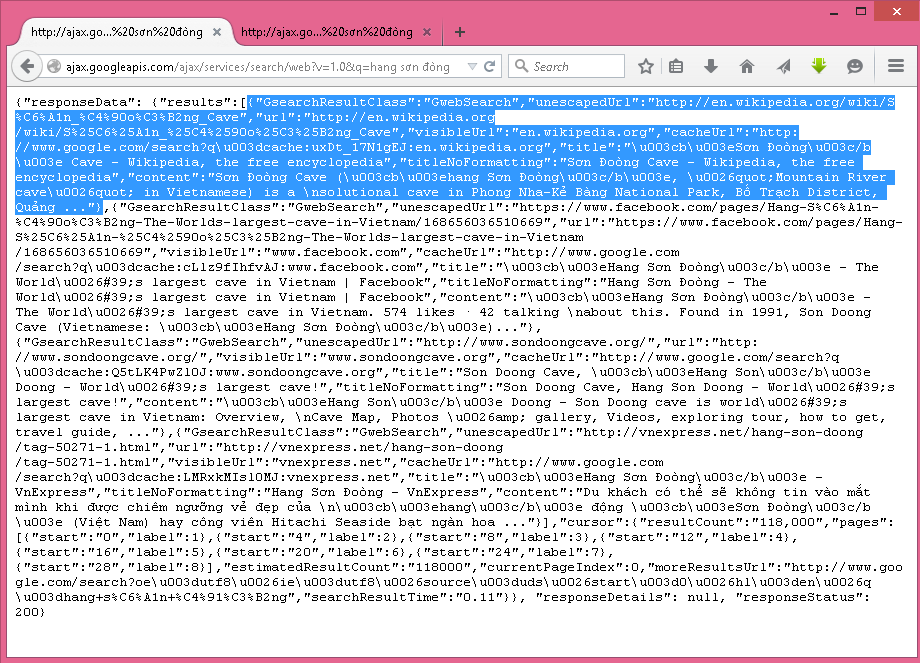 Tương tự như vậy bạn có thể quan sát các thông số khác để biết đâu là đối tượng, đâu là danh sách đối tượng.
– TUY NHIÊN trong bài này tui chỉ lấy 2 thông số chính từ kết quả trả về đó là titleNoFormatting và url.
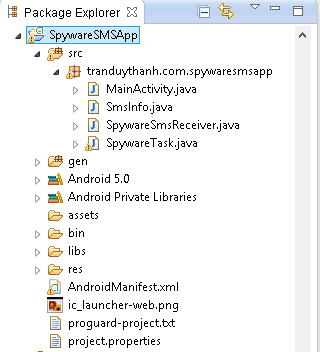
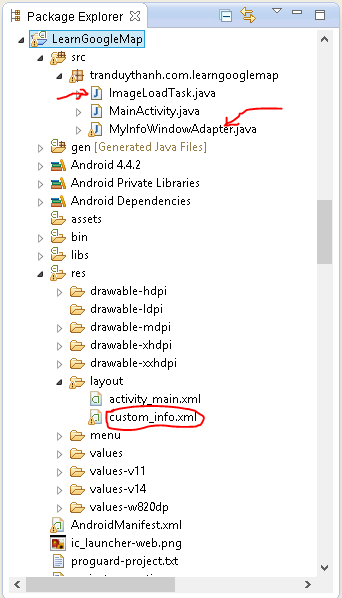
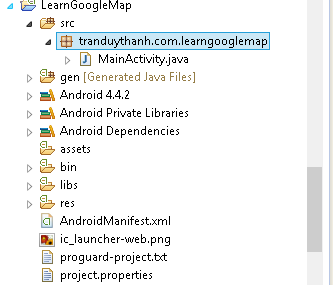
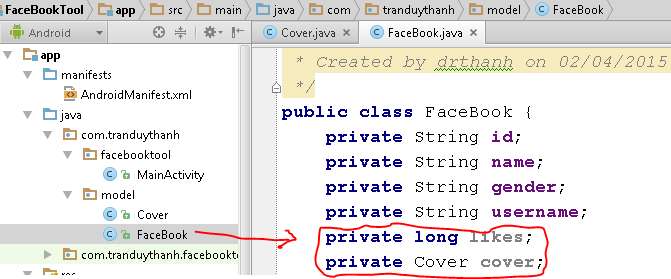
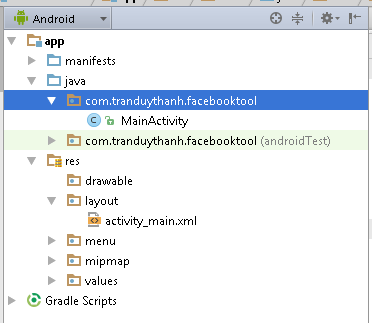
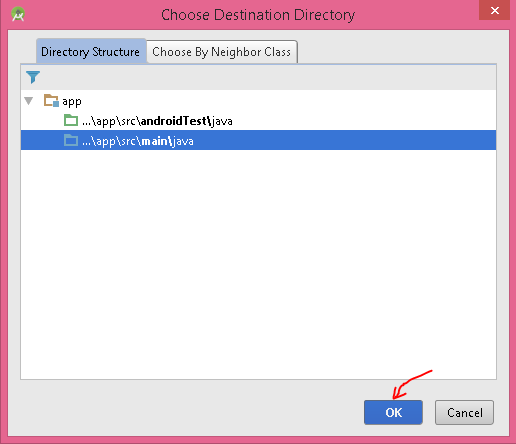
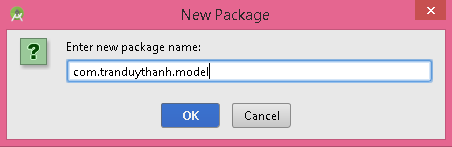
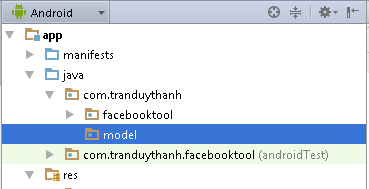
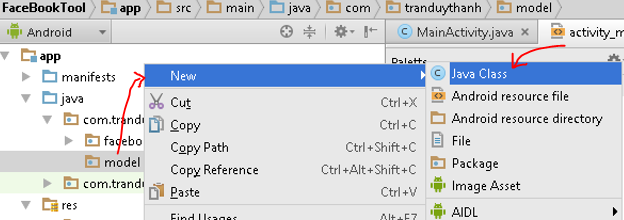
Tới đây thì bạn phải biết cách tạo danh sách các class như sau: 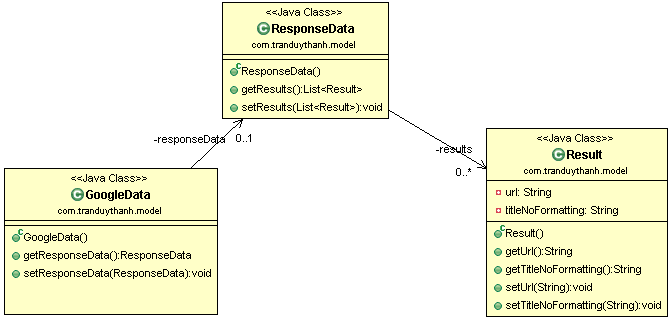 – Bạn tạo một Project tên là “GoogleSearchTool“, có cấu trúc như sau:
 – Giải thích sơ sơ:
+ Các lớp nằm trong model là lớp định dạng lấy thông tin từ JSon: GoogleData,ResponseData,Result
+ Lớp GoogleSearchAPI dùng để tải thông tin từ Google Search API
+ Lớp MyArrayAdapter để hiển thị custom control trên ListView.
+ MainActivity là Activity dùng cho người sử dụng tương tác phần mềm, ở trong này có một class GoogleSearchThread để tiến hành dùng kỹ thuật đa tiến trình để gọi GoogleSearchAPI thực thi.
+ Layout: Có custom_row_layout để hiển thị custom cho từng dòng trong ListView.
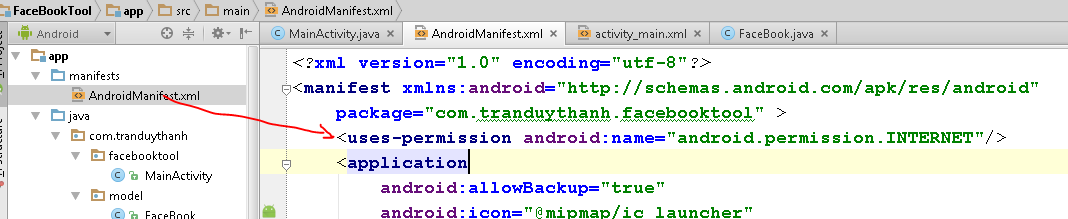
– Chú ý vì có kết nối internet nên bạn phải cấp quyền sử dụng trong AndroidManifest nhé.
– Ta bắt đầu tiến hành Coding như sau:
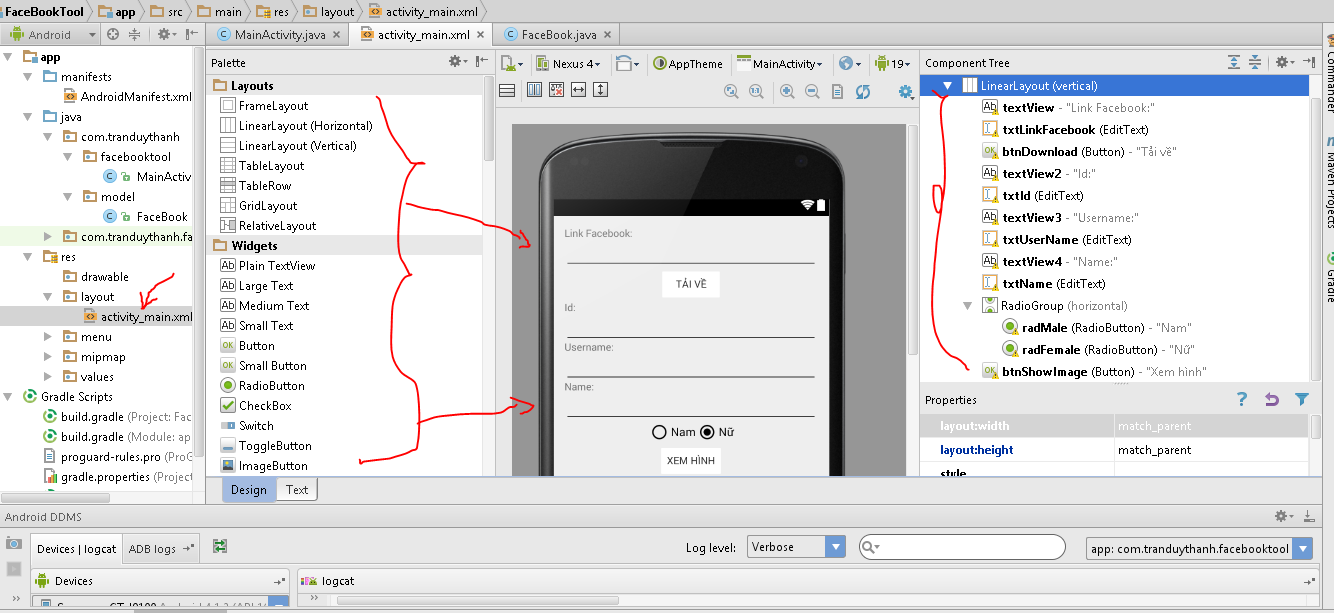
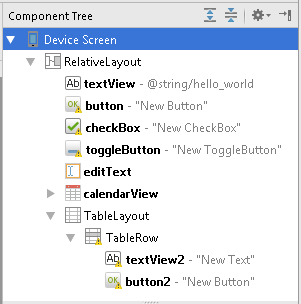
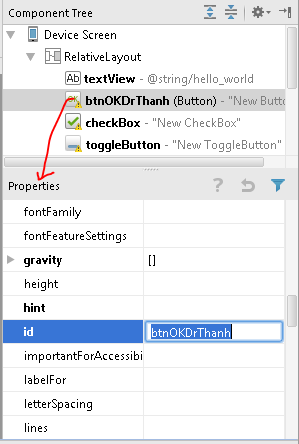
1) thiết kế giao diện cho ứng dụng: – Bạn có thể nhìn vào Component Tree để thiết kế giao diện cho ứng dụng, tuy nhiên có thể copy XML Layout sau:
activity_main.xml:
[code language=”xml”]
<LinearLayout xmlns:android="http://schemas.android.com/apk/res/android"
xmlns:tools="http://schemas.android.com/tools" android:layout_width="match_parent"
android:layout_height="match_parent" android:paddingLeft="@dimen/activity_horizontal_margin"
android:paddingRight="@dimen/activity_horizontal_margin"
android:paddingTop="@dimen/activity_vertical_margin"
android:orientation="vertical"
android:paddingBottom="@dimen/activity_vertical_margin" tools:context=".MainActivity">
<TextView
android:layout_width="match_parent"
android:layout_height="wrap_content"
android:text="Nhập chuỗi cần tìm:"
android:id="@+id/textView" />
<EditText
android:layout_width="match_parent"
android:layout_height="wrap_content"
android:id="@+id/txtQuery"
/>
<Button
android:layout_width="wrap_content"
android:layout_height="wrap_content"
android:text="Tìm kiếm"
android:id="@+id/btnTimKiem"
android:layout_gravity="center_horizontal" />
<TextView
android:layout_width="match_parent"
android:layout_height="wrap_content"
android:text="Kết quả tìm được:"
android:id="@+id/textView2"
android:layout_gravity="center_horizontal"
android:background="#000040"
android:textColor="#FFFFFF" />
<ListView
android:layout_width="match_parent"
android:layout_height="match_parent"
android:id="@+id/lvResult"
android:layout_gravity="center_horizontal" />
</LinearLayout>
[/code]
– Tiếp theo thiết kê giao diện cho Custom row:
custom_row_layout.xml:
[code language=”xml”]
<?xml version="1.0" encoding="utf-8"?>
<LinearLayout xmlns:android="http://schemas.android.com/apk/res/android"
android:layout_width="match_parent" android:layout_height="match_parent"
android:orientation="vertical"
>
<TextView
android:layout_width="match_parent"
android:layout_height="wrap_content"
android:id="@+id/txtTitle"
android:hint="Title ở đây" />
<TextView
android:layout_width="match_parent"
android:layout_height="wrap_content"
android:id="@+id/txtLink"
android:layout_gravity="center_horizontal"
android:hint="Link ở đây"
android:textColor="#000040" />
</LinearLayout>
[/code]
– Custom row đơn giản chi có 2 control, dòng 1 là tiêu đề kết quả, dòng 2 là link xem chi tiết.
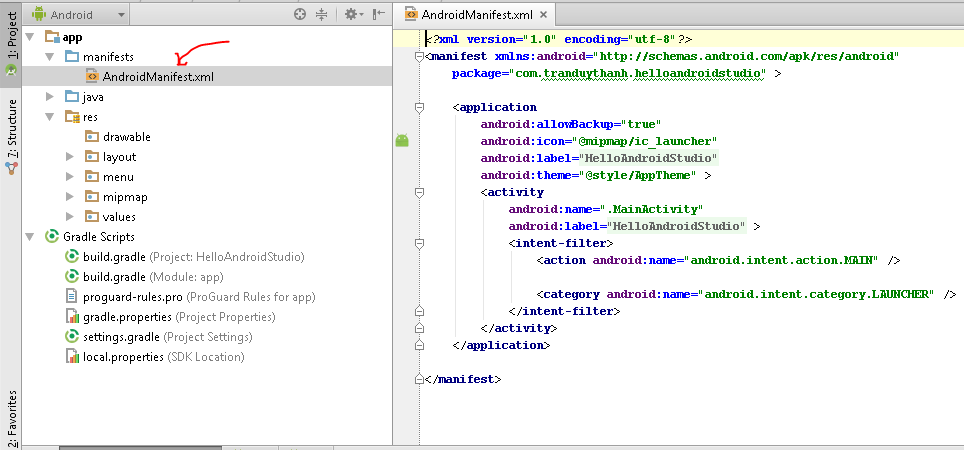
2) Cấu hình cấp quyền Internet cho ứng dụng trong AndroidManifest.xml:
[code language=”xml”]
<?xml version="1.0" encoding="utf-8"?>
<manifest xmlns:android="http://schemas.android.com/apk/res/android"
package="com.tranduythanh.googlesearchtool" >
<uses-permission android:name="android.permission.INTERNET"/>
<application
android:allowBackup="true"
android:icon="@mipmap/ic_launcher"
android:label="@string/app_name"
android:theme="@style/AppTheme" >
<activity
android:name=".MainActivity"
android:label="@string/app_name" >
<intent-filter>
<action android:name="android.intent.action.MAIN" />
<category android:name="android.intent.category.LAUNCHER" />
</intent-filter>
</activity>
</application>
</manifest>
[/code]
3) Tiến hành coding cho các lớp :
-GoogleSearchAPI:
[code language=”java”]
package com.tranduythanh.utils;
import com.google.gson.Gson;
import com.tranduythanh.model.GoogleData;
import com.tranduythanh.model.Result;
import java.io.IOException;
import java.io.InputStreamReader;
import java.io.UnsupportedEncodingException;
import java.net.MalformedURLException;
import java.net.URL;
import java.net.URLEncoder;
/**
* Created by drthanh on 03/04/2015.
*/
public class GoogleSearchAPI {
/**
* Hàm này dùng để tìm kiếm một từ khóa bất kỳ trên internet thông qua Google Search API
* @param query – từ khóa muốn tìm kiếm
* @param charset – UTF-8
* @param start – lấy từ 0…n, mỗi lần Search lấy 4 hoặc 8 block kết quả
* @param block – truyền 4 hoặc 8
* @return trả về GoogleData
*/
public static GoogleData search(String query,String charset,int start,int block)
{
try {
String address = "http://ajax.googleapis.com/ajax/services/search/web?v=1.0&q=";
URL url;
url = new URL(address + URLEncoder.encode(query, charset)+"&start="+start+"&rsz="+block);
InputStreamReader reader = new InputStreamReader(url.openStream(), charset);
GoogleData results = new Gson().fromJson(reader, GoogleData.class);
return results;
} catch (MalformedURLException e) {
// TODO Auto-generated catch block
e.printStackTrace();
} catch (UnsupportedEncodingException e) {
// TODO Auto-generated catch block
e.printStackTrace();
} catch (IOException e) {
// TODO Auto-generated catch block
e.printStackTrace();
} catch (NumberFormatException e) {
// TODO Auto-generated catch block
e.printStackTrace();
}
return null;
}
}
[/code]
Lớp Result:
[code language=”java”]
package com.tranduythanh.model;
public class Result {
private String url;
private String titleNoFormatting;
public String getUrl()
{
return url;
}
public String getTitleNoFormatting()
{
return titleNoFormatting;
}
public void setUrl(String url)
{
this.url = url;
}
public void setTitleNoFormatting(String titleNoFormatting)
{
this.titleNoFormatting = titleNoFormatting;
}
}
[/code]
Lớp ResponseData:
[code language=”java”]
package com.tranduythanh.model;
import java.util.List;
public class ResponseData {
private List<Result> results;
public List<Result> getResults()
{
return results;
}
public void setResults(List<Result> results)
{
this.results = results;
}
}
[/code]
Trong lớp ResponseData nó sẽ có một danh sách các Result giống như trong định dạng JSon.
Lớp GoogleData:
[code language=”java”]
package com.tranduythanh.model;
public class GoogleData {
private ResponseData responseData;
public ResponseData getResponseData()
{
return responseData;
}
public void setResponseData(ResponseData responseData)
{
this.responseData = responseData;
}
}
[/code]
– Như vậy ta đã đáp ứng được mô hình Java class để lấy thông tin từ định dạng JSOn.
– Coding lớp MyArrayAdapter:
Lớp này dùng để chỉnh sửa cách hiển thị dữ liệu lên ListView theo như mô tả ở trên,
Nếu bạn chưa hiểu về customlayout thì bắt buộc phải đọc các bài này trước:
Bài tập 14: Thực hành về Custom Layout cho ListView trong Android
Bài tập 25: Tiếp tục củng cố kiến thức Intent, ví dụ tổng hợp Quản Lý Nhân Viên
[code language=”java”]
package com.tranduythanh.googlesearchtool;
import android.app.Activity;
import android.content.Context;
import android.view.LayoutInflater;
import android.view.View;
import android.view.ViewGroup;
import android.widget.ArrayAdapter;
import android.widget.TextView;
import com.tranduythanh.model.Result;
import java.util.List;
/**
* Created by drthanh on 03/04/2015.
*/
public class MyArrayAdapter extends ArrayAdapter<Result>
{
Activity context;
int resource;
List<Result>objects;
public MyArrayAdapter(Activity context, int resource, List<Result> objects) {
super(context, resource, objects);
this.context=context;
this.resource=resource;
this.objects=objects;
}
@Override
public View getView(int position, View convertView, ViewGroup parent) {
LayoutInflater inflater =this.context.getLayoutInflater();
View customRow= inflater.inflate(this.resource,null);
TextView txtTitle= (TextView) customRow.findViewById(R.id.txtTitle);
TextView txtLink= (TextView) customRow.findViewById(R.id.txtLink);
Result result=this.objects.get(position);
txtTitle.setText(result.getTitleNoFormatting());
txtLink.setText(result.getUrl());
if(position%2==0)
txtTitle.setTextColor(this.context.getResources().getColor(android.R.color.holo_blue_dark));
else
txtTitle.setTextColor(this.context.getResources().getColor(android.R.color.holo_red_dark));
return customRow;
}
}
[/code]
– Cuối cùng là lớp MainActivity:
[code language=”java”]
<pre>
package com.tranduythanh.googlesearchtool;
import android.content.Intent;
import android.net.Uri;
import android.os.AsyncTask;
import android.os.SystemClock;
import android.support.v7.app.ActionBarActivity;
import android.os.Bundle;
import android.view.Menu;
import android.view.MenuItem;
import android.view.View;
import android.widget.AdapterView;
import android.widget.Button;
import android.widget.EditText;
import android.widget.ListView;
import android.widget.Toast;
import com.google.gson.Gson;
import com.tranduythanh.model.GoogleData;
import com.tranduythanh.model.Result;
import com.tranduythanh.utils.GoogleSearchAPI;
import java.io.IOException;
import java.io.InputStreamReader;
import java.io.UnsupportedEncodingException;
import java.net.MalformedURLException;
import java.net.URL;
import java.net.URLEncoder;
import java.util.ArrayList;
import java.util.List;
public class MainActivity extends ActionBarActivity {
EditText txtQuery;
Button btnSearch;
ListView lvResult;
List<Result>arrData;
MyArrayAdapter adapter;
@Override
protected void onCreate(Bundle savedInstanceState) {
super.onCreate(savedInstanceState);
setContentView(R.layout.activity_main);
addControls();
addEvents();
}
private void addControls() {
txtQuery= (EditText) findViewById(R.id.txtQuery);
txtQuery.setText("Hang sơn Đòng");
btnSearch= (Button) findViewById(R.id.btnTimKiem);
lvResult= (ListView) findViewById(R.id.lvResult);
arrData=new ArrayList<>();
adapter=new MyArrayAdapter(MainActivity.this,R.layout.custom_row_layout,arrData);
lvResult.setAdapter(adapter);
}
private void addEvents() {
btnSearch.setOnClickListener(new View.OnClickListener() {
@Override
public void onClick(View v) {
processSearch();
}
});
lvResult.setOnItemClickListener(new AdapterView.OnItemClickListener() {
@Override
public void onItemClick(AdapterView<?> parent, View view, int position, long id) {
//hiển thị LInk đang chọn trên ListView:
Intent browserIntent = new Intent(Intent.ACTION_VIEW, Uri.parse(arrData.get(position).getUrl()));
startActivity(browserIntent);
}
});
}
private void processSearch() {
arrData.clear();
//Gọi đa tiến trình
GoogleSearchThread task=new GoogleSearchThread();
task.execute(txtQuery.getText()+"");
}
/**
* lớp cho phép chạy đa tiến trình
*/
private class GoogleSearchThread extends AsyncTask<String,Result,List<Result>>
{
@Override
protected void onPreExecute() {
super.onPreExecute();
}
@Override
protected List<Result> doInBackground(String… params) {
String query=params[0];
GoogleData data= GoogleSearchAPI.search(query,"UTF-8",0,8);
if(data.getResponseData()==null)
return null;
for(Result r: data.getResponseData().getResults())
{
//gửi kết quả qua onProgressUpdate để cập nhật giao diện:
publishProgress(r);
SystemClock.sleep(1000);
}
return data.getResponseData().getResults();
}
@Override
protected void onProgressUpdate(Result… values) {
super.onProgressUpdate(values);
arrData.add(values[0]);
adapter.notifyDataSetChanged();
}
@Override
protected void onPostExecute(List<Result> results) {
super.onPostExecute(results);
Toast.makeText(MainActivity.this,"Đã tìm kiếm được "+results.size()+" kết quả",Toast.LENGTH_LONG).show();
}
}
@Override
public boolean onCreateOptionsMenu(Menu menu) {
// Inflate the menu; this adds items to the action bar if it is present.
getMenuInflater().inflate(R.menu.menu_main, menu);
return true;
}
@Override
public boolean onOptionsItemSelected(MenuItem item) {
// Handle action bar item clicks here. The action bar will
// automatically handle clicks on the Home/Up button, so long
// as you specify a parent activity in AndroidManifest.xml.
int id = item.getItemId();
//noinspection SimplifiableIfStatement
if (id == R.id.action_settings) {
return true;
}
return super.onOptionsItemSelected(item);
}
}
[/code]
– Như vậy bạn đã làm xong trường hợp định dạng JSon phức tạp, từ đây về sau có những dự án liên quan tới JSON thì bạn có thể làm theo cách này, chỉ cần đọc phân tích đúng thông tin trong JSON để từ đó tạo class Java phù hợp là OK.
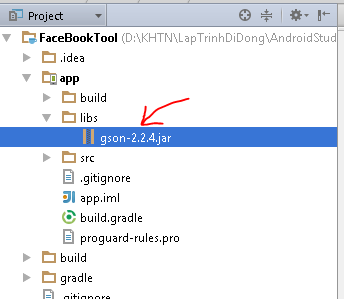
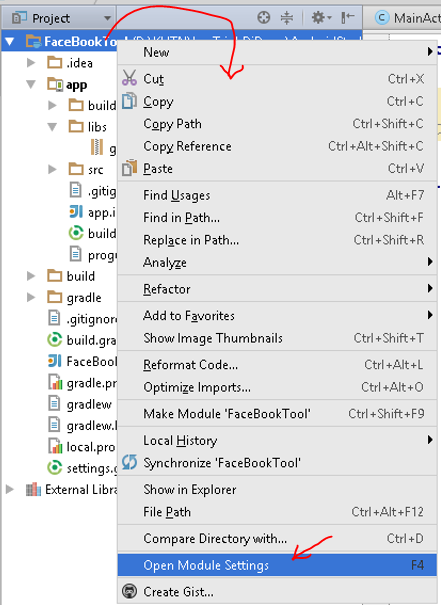
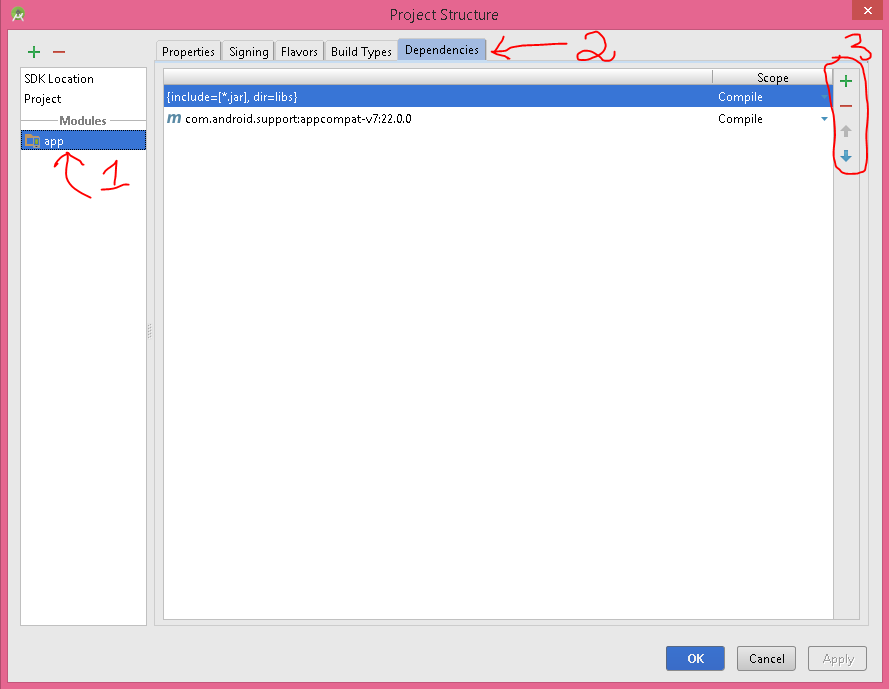
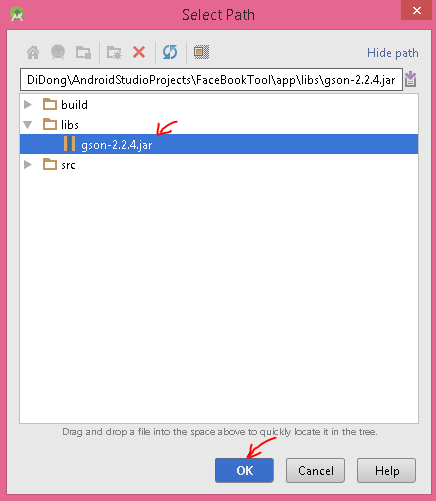
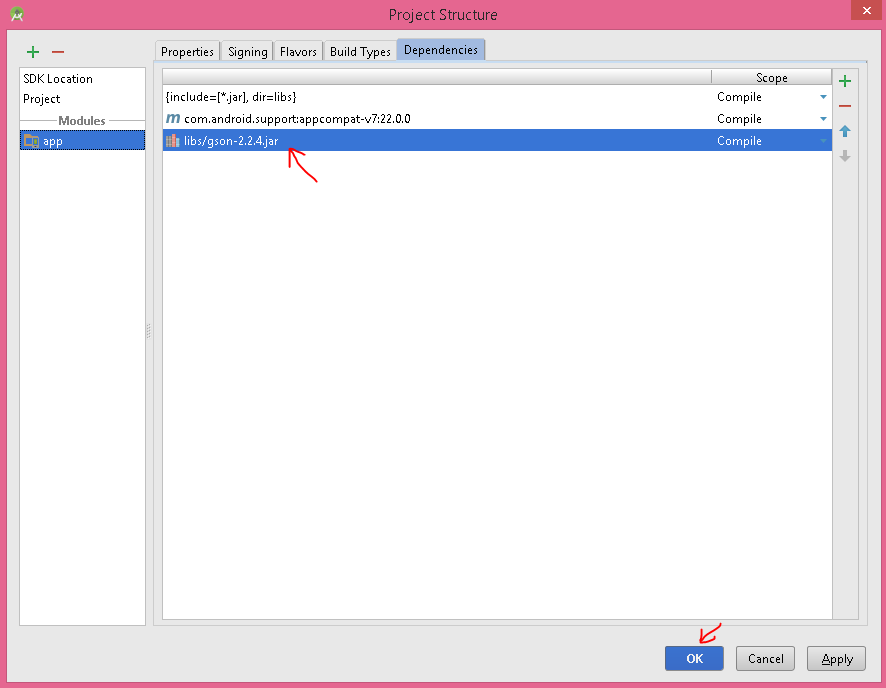
-Chú ý là phải tham chiếu tới thư viện gson-2.2.4.jar nhé.
– Bài tập kế tiếp Tui sẽ viết một phần mềm dựa trên JSON để Dự Báo Thời Tiết (thời tiết thực tế ở một địa điểm bất kỳ nào đó trên thế giới).
-Bạn có thể coding của bài này ở đây: http://www.mediafire.com/download/bew37pegs3n0z85/GoogleSearchTool.rar
– Chúc các bạn thành công!


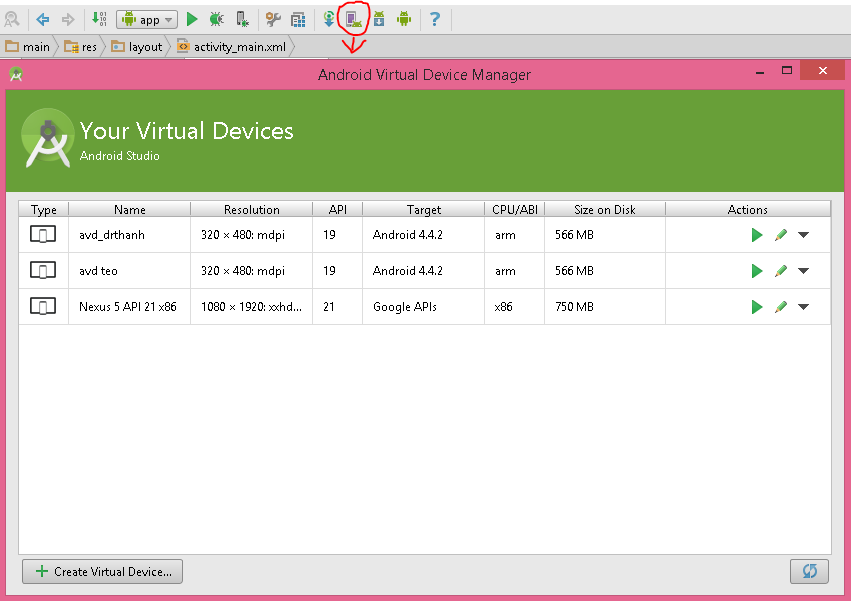
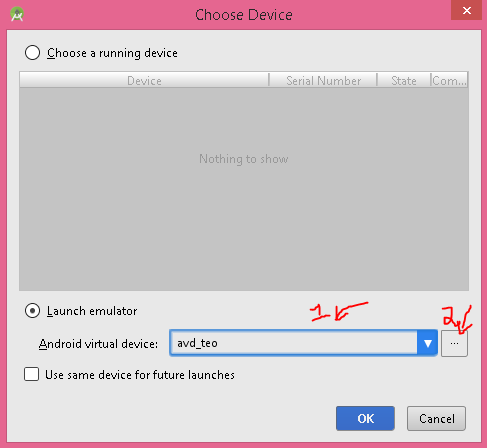
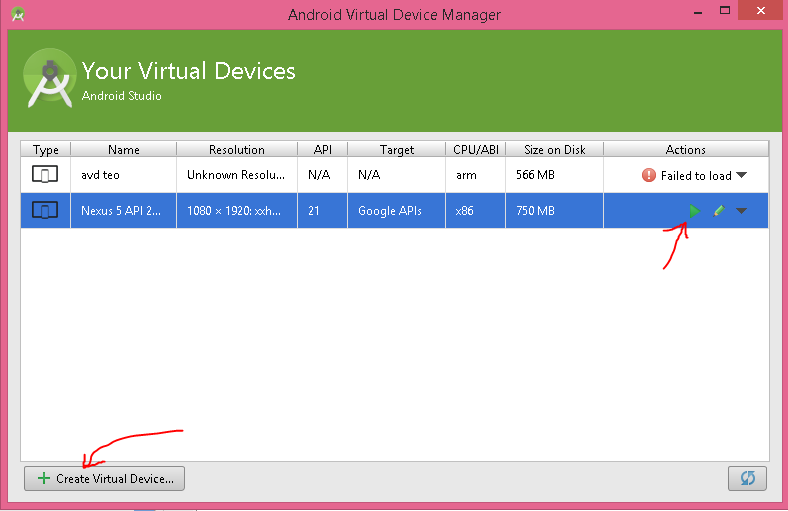
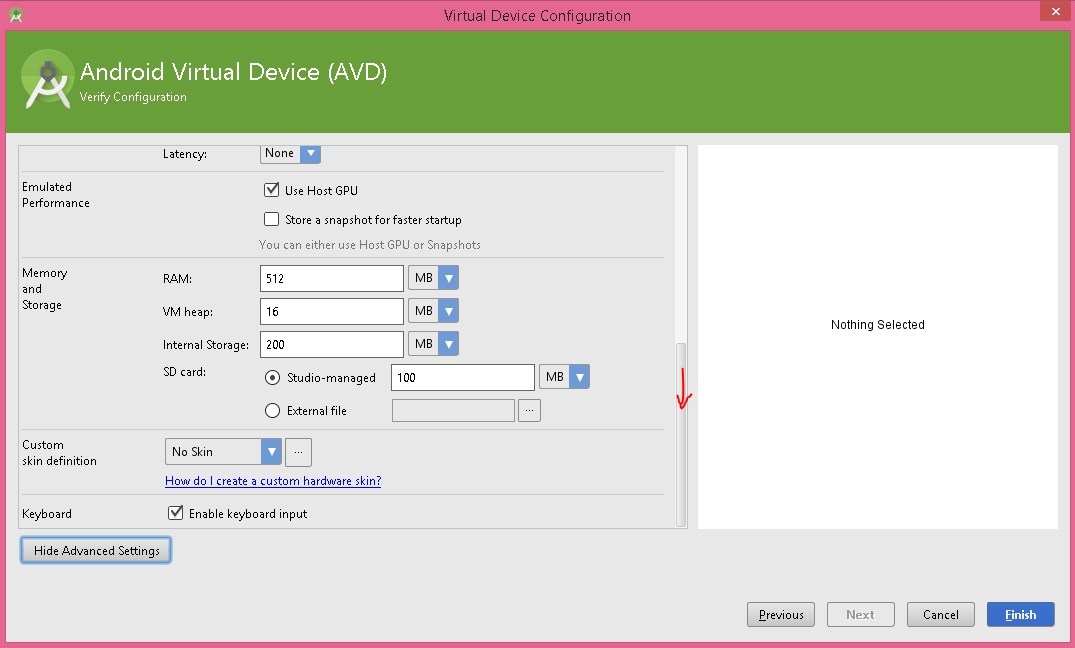
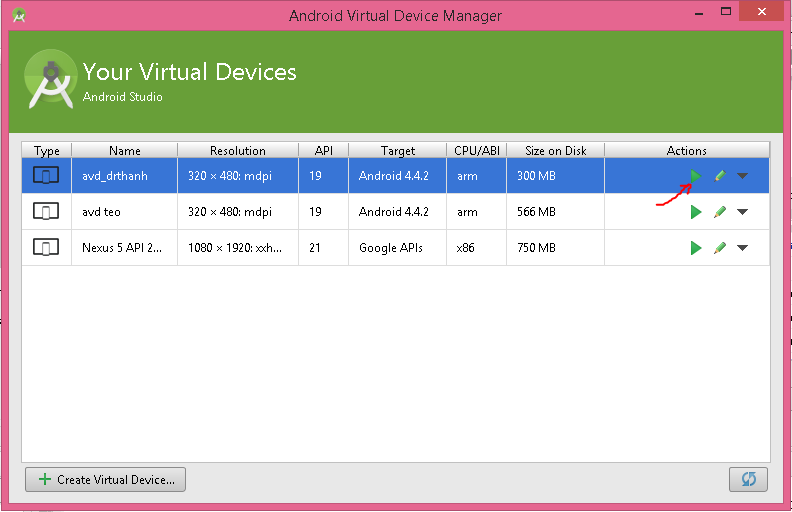
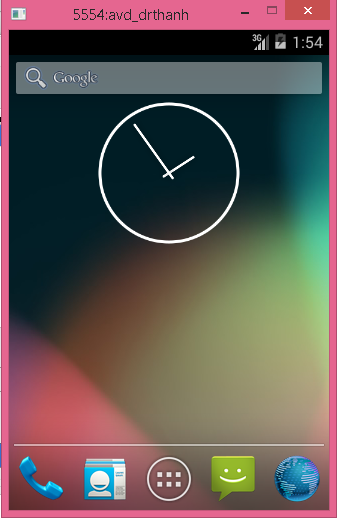
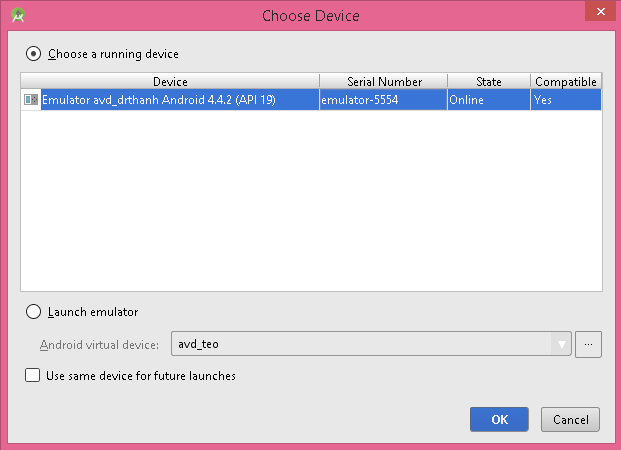
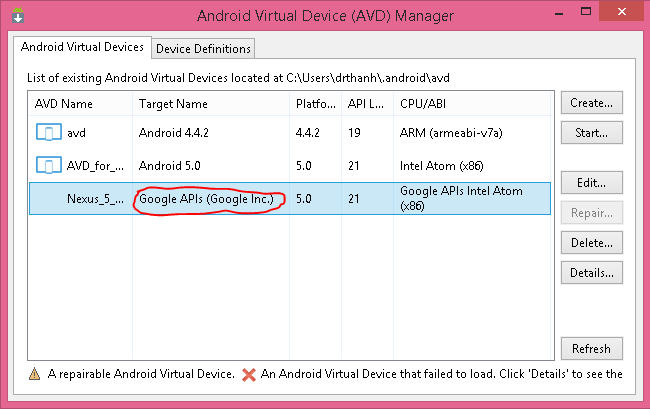
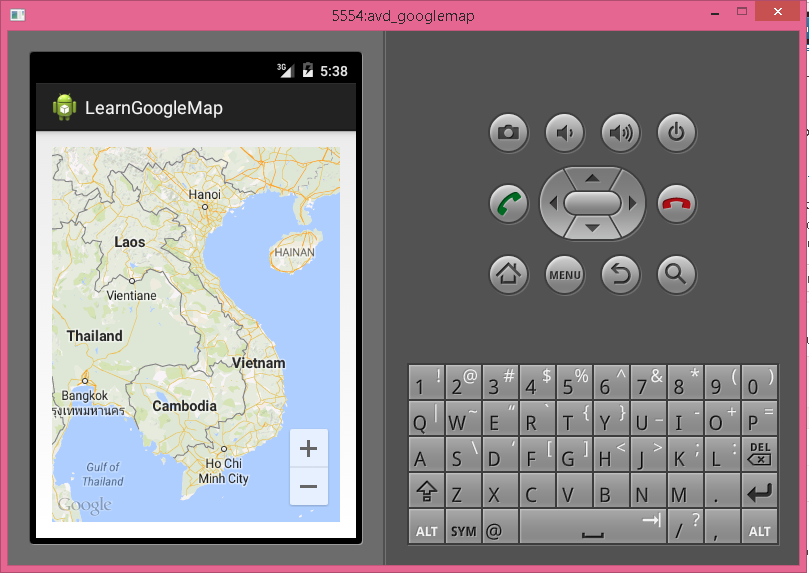
 – Quản lý máy ảo (AVD Manager)